Sunday, February 3, 2013

Man Cave

At the old house, I never really got to enjoy the basement after it was renovated. That was a bit disappointing, but the new house came with a great finished basement. The space had a built-in to the side of the room for media components, and some wiring for surround sound. While wire was run, it was just hanging out of the wall in a bundle at the back of the built-in (sorry, no before pics) and cables were not run to the wall where the TV would hang. Please note my foam Michigan Wolverine foam head at the bottom of the cabinet.

IMG_7220.jpg

Soon after moving in work began to finish the space. I cut a gaggle of holes into the drywall and ran 2 HDMI cables, 1 set of RCA cables, and an optical cable from the built-in to the TV. I picked up a new tv and a slim TV mount because I didn't want my TV sticking out too much, and some wall plates for all the speaker wires. I got all the cables from monoprice and after reading reviews I decided to the speakers there too. I got some front speakers, center speakers, rear mount speakers for the ceiling and a small sub. I really liked the look of everything built in and not needing a media cabinet in front of the TV.

IMG_7182.jpg

Since we loved our previously purchased Crate & Barrel Axis sectional we decided to also go with C&B for downstairs. We went with the Vaughan. While not as comfortable as the Axis, it was a much smaller sectional that fit in the 12'x 12' space and still allowed room for a chair. We threw some beer themed pictures up on the wall to complete the man cave aesthetic and now the space is complete.

IMG_7223.jpg

On the back wall are closets that run the width of the house, and the sump pump in the right-most closet. The chairs are on this side to make sure we can still access the space. We also got a white ceramic deer head as a Christmas white elephant gift, so we decided to hang it above the TV. Gotta keep it classy.

IMG_7180.jpg

Friday, February 1, 2013

Bawlmer Art

With the Baltimore Ravens making the Super Bowl, the country is about to be bombarded with the wonderful Baltimore accent. How can you tell if someone is from here? They've abolished the "T" in Baltimore, preferring either Bawlmer, or Baldamore. I don't understand it, but I've grown accustomed to it. But I digress. This post is about art, but especially local Bawlmer art. I love local art because it provides so much character and is just fun to shop for. There is nothing like the feeling of digging through a pile of junky art at the thrift store to find a gem. My second favorite find is a map we found in Hampden, a young quirky hipster filled haven of art, midcentury furniture and Pabst Blue Ribbon. It is a railroad map of Baltimore from 1948.

Baltimore Railroad Map


The map was in the basement of a thrift shop, unframed and mounted on canvas. It is in great condition, and I loved the historic industrial roots of the city in such vivacious color. After $100 for the art, an arm and a leg to frame it, it has a place in the front of the basement (aka, the Leely-cave).

Baltimore Railroad Map


At the same store in Hampden we found another local artist, Greg Otto. This picture was at the back of a heap of crappy art, and it was even signed by the artist. $25 later, and a promise of a future first born child to get it framed, it sits in our living room.

Fed / Fells - Greg Otto


After finding the one Greg Otto print I've kept my eyes peeled for more. The Maryland Society for the Prevention of Cruelty to Animals had an online auction with a Greg Otto picture with Uniquely Baltimore written on it. How could I resist? A size wasn't listed and there wasn't much description, but we took a gamble and for less than $20 it was ours. It arrived and we found it in perfect condition. And it was also signed. SCORE. Since this was a standard size, custom framing wasn't required and the promise of a second born is deferred until our next art purchase.

Uniquely Baltimore - Greg Otto


The next picture was a gift from Valerie, my sister in law, and we absolutely love it. She commissioned a picture of our house from the talented Miranda.

Our House


She did an amazing job and we look forward to always having a keepsake of this house. I also keep meaning to commission a print of the other house too. I'll need to get on that. Miranda also does pictures of normal houses (not just rowhomes) and did a great job on a picture of my in-laws home. You should go over to her House Love Shop to order a print of your home.

Saturday, January 26, 2013

All is Well

After living in the house for a year, it isn't really new anymore, but it still feels new to us. Some of the shiny newness has worn off due to some construction issues but we still love the place. It has been adjustment of not being able to start with a blank slate of a space and build what I want. I miss being able to rip out walls, frame new ones, run all the electrical, drywall, paint and trim a space. I don't miss the dust. I don't miss the mess. I do enjoy having more time. The extra time means more decorating and upgrades and less making a space livable and safe. I've also found my niche for decorating - art. I seem to get lucky by finding art on craigslist, antique markets, or charity auctions. Our ultimate find was a 4'x6' painting by Gladys Goldstein.

New York Abstract

The painting is an abstract of the New York skyline, and a label on the back said it hung in DC's Corcoran Gallery in 1969. Our first floor has something like 13' ceilings so it fits perfectly in our kitchen. We love it. I'll post some pictures of some other art finds soon.

During the past couple of years, despite less renovation, life has kept us busy. We had a trip to Ireland, including a stop in Galway where we sat on the grass and enjoyed this view.

Galway


We haven't taken enough vacations though, so hopefully we can make more time in the coming years to get out and see more. I look forward to more adventures with this lovely lady.

IMG_6974.jpg

Thursday, August 4, 2011

Basement Complete

At last glance, the basement was framed and electrical rough in complete. Not pretty, but well along. At this point, I can proudly say the space is complete. We brought in a contractor to hang and finish the drywall as well as hang and trim the doors. At the time, I was unsure of using contractors, but in the end I'm glad we did this. The price was reasonable and in the tight timeline of getting the place rented out we needed this done quickly.

The contractors finished up on Thursday. Friday through Sunday we had a lot of help from the Bro in Law (BIL) and Sister in Law (SIL). By the time the dust settled and the carpet was installed, we went from a space with drywall and doors hung to this.


IMG_2767

We are still amazed of the transformations. The ceiling height is only around 6'6" but thankfully it doesn't feel too short. I wish it were taller but it wasn't worth the extra money of digging it out. We painted it the same color as the master bedroom, and are glad we did so. We painted the area underneath the return duct semi-gloss white for contrast and to the right you can see how the window and bench turned out.

Looking back from the front of the house toward the stairs is the door to the utility closet to the left, the door to the unfinished area in the middle, and to the right the stairs up to the first floor.

IMG_2765

Thus far our only regret is that we didn't do it sooner. With buying the new place we won't ever have a chance to truly enjoy this basement. Hopefully our renter enjoys it, and looking back, it is quite an improvement.

IMG_2767

Sunday, July 24, 2011

Basement Framing & Electrical Rough-In Complete

Now that we are under contract on the new place, the basement renovation kicks into high gear. Much like in December of 2008 when we decided to refinance our mortgage and creating a deadline to finish renovations, we are now in a similar position. We want our house occupied by a renter on 9/1. Yowza. With a basement under construction, a new house upcoming, a trip to Irelend, and finding out what the hell we need to do to rent the place the next month will be crazy. Time to kick things in gear...

In keeping with this, we are bringing in some help on the drywall. We got a bunch of quotes that were surprisingly reasonable. We ended up picking a mid-cost quote of a guy that I trusted. We then got him to throw in a bunch of extra work like hanging all the door jambs and doors and fixing a three switch that had gotten the best of me. An aside, when picking contractors, I usually go with my gut. This is never the high cost bidder, but usually someone at the mid to low end that will end up working with me a bit. This sometimes means quality is 90% instead of 100% but the lower costs have been things that I've been able to help fix.

Here is where we stand. Coming down the stairs, all the paneling, plaster and lathe, and most importantly the stairs were ripped out and recessed lights on a 3 way switch were put in. It looks great now.


Basement Reno - Framing & Electrical Rough-In

During the renovation it didn't look as good. I was hoping to keep the stairs as is, but after looking at them in detail they needed to be replaced. They literally bounced when you walked on them and were held up by about 6 nails total. Scary. Luckily, my amazing father agreed flew in from Detroit to help frame the basement and (little did he know at the time) replace the stairs. This basement would not be done if not for him. As you can see, the stairs were scary.

basement stairs

Walking to the bottom of the stairs and looking out things look much different than before. Before, it was a pile of crap.

dirty basement with captions

The view looks much better now. All the recessed lights are in, the plumbing lines and electrical to the second floor have all been rerouted to increase the headroom, and insulation is in place to help isolate the sound from the first floor living room.

Basement Reno - Framing & Electrical Rough-In

A look back at the stairs and portion of the remaining basement that will remain shows the recessed lights back in that area. I put the lights on a motion sensing/IR switch so when you walk in the space with your arms full of laundry you don't need to find a switch. We were talking about making a bar or closet in the area to the left but now that we are going to rent the space, this isn't a priority.

Basement Reno - Framing & Electrical Rough-In

To the right of the stairs is the framing around the HVAC. I added a small step at the bottom of the stairs to steer you toward the center of the room and away from the framing around the HVAC return. I was going to put a custom wine rack in this area, but again, this isn't a priority at this point. I added electricals circuit here in case I want to get fancy in the future with lighting the wine or potenially add a small bar over here.

Basement Reno - Framing & Electrical Rough-In

Walking a few steps forward, you can see more of what the living space will look like. A small closet is on the left, and I made a bench underneath the window to fill this dead space. On the right, there is a storage area that is accessed through the utility room door. Originally I was going to just do a soffit in this area, but the HVAC and water heater exhaust would still have been too low to make this area usable so I just closed this space in. The soffit change resulted swapping the seating area to the left instead of the right, but it shouldn't be that big of an issue.

Basement Reno - Framing & Electrical Rough-In

Looking back toward the stairs you can see this utility room. This room required moving the water heater to allow one door to be able to service the equipment while allowing space into the closet space to the left.

Basement Reno - Framing & Electrical Rough-In

While overall I don't like using contractors, it is nice to know that by the end of this week the drywall will be in and mudded and all doors hung. As I type, guys are loading drywall into the house. Hopefuly it will be hung with a first coat of mud in place by the end of today. :-)

Friday, July 22, 2011

The New Casa: A Sneak Peak

We considered buying a "shell" and having a contractor do the work to finish it. After we found this house for a good deal, we knew this was the house for us. Take a peak.

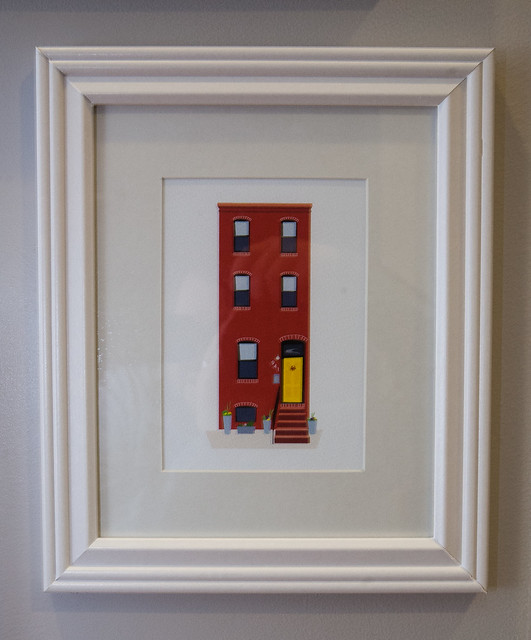
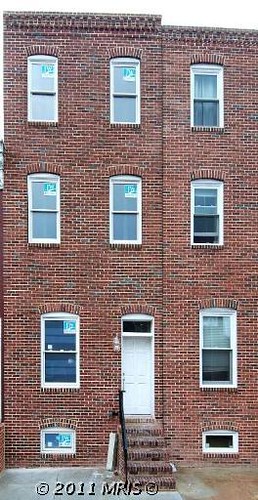
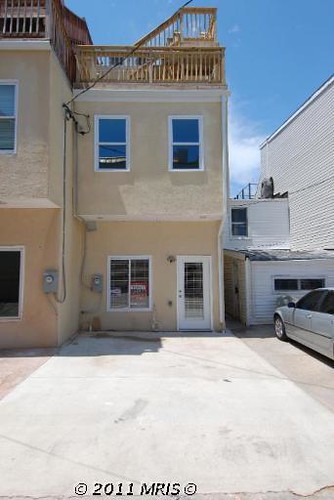
Here is the outside of the house, which is just fine. No great curb appeal. Since this picture was taken they painted the trim black and the door a nice gray.


front

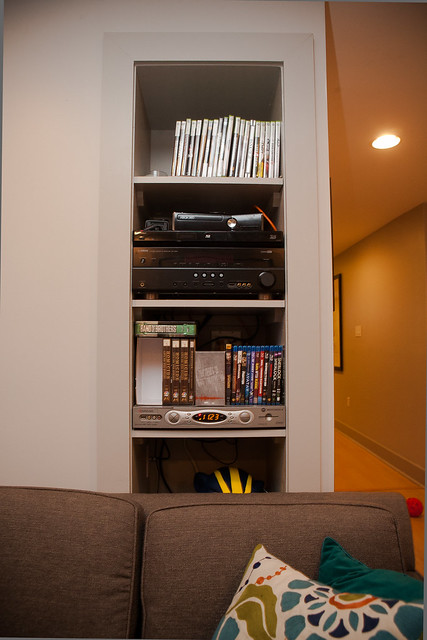
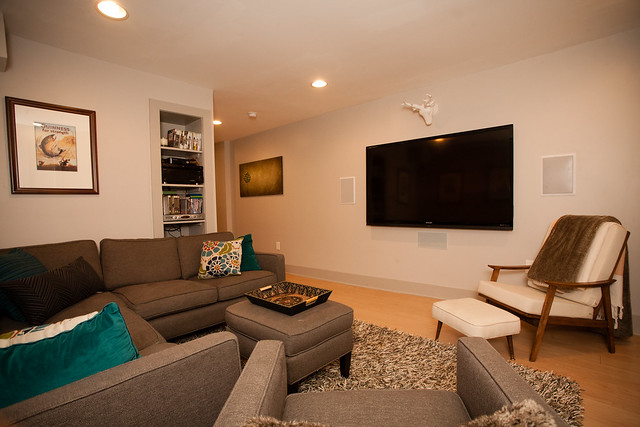
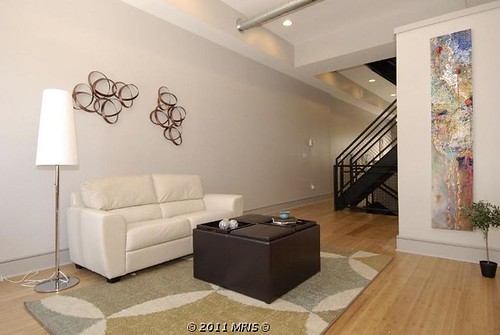
Through the front door is the living room, with a small 1/2 bath on the right. The ceilings are 12-14' tall on this floor, so while this house is the same width as our (about 12' interior), the ceiling height helps make it feel larger.

living room

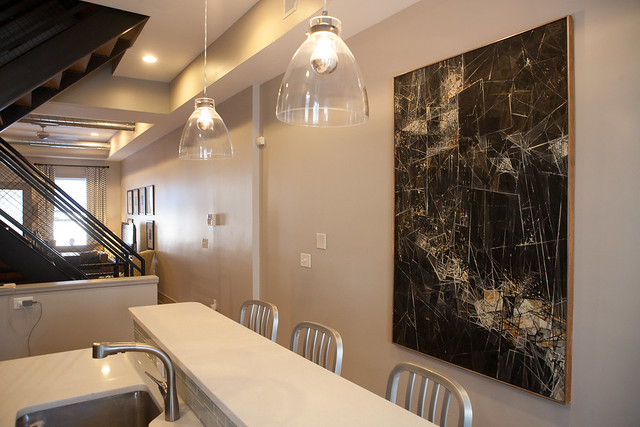
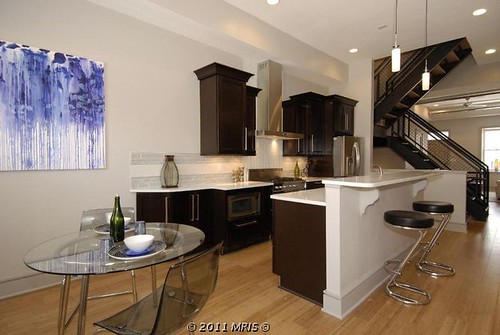
At the back of the house is the kitchen and dining room. The stairs of the house are in the middle, bisecting the space. Since they are an open stair it helps to make things still feel open. The kitchen has nice cabinets, counters, appliances, and a pretty good overall design.

kitchen 2

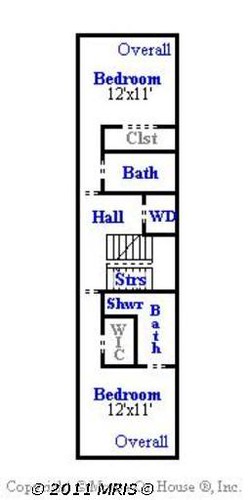
Here is the second floor layout, showing the two bedrooms each with their own bathrooms. Also, having the washer and dryer on this floor is pretty nice.

second floor plan

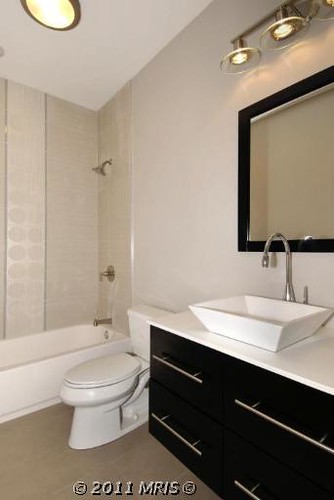
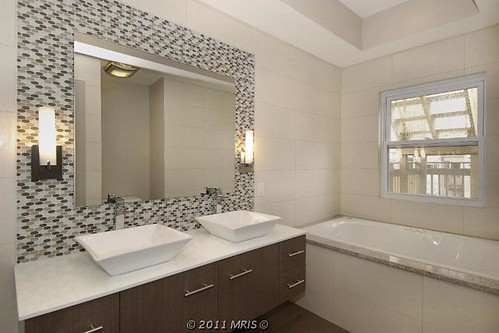
I can't pull the pics of the bedrooms into this post, but both they and the baths are pretty nice. Here is a sample of the bathrooms. Overall the tile quality is good in all of the 4.5 bathrooms. I don't know what we are going to do with all of those bathrooms, but the more the merrier?

back bed bath

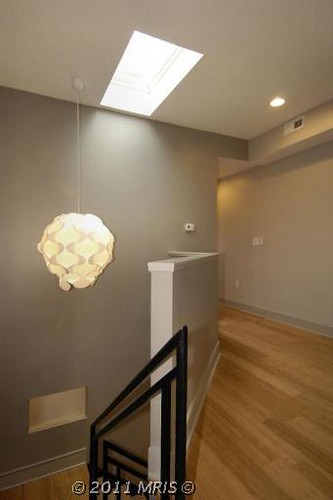
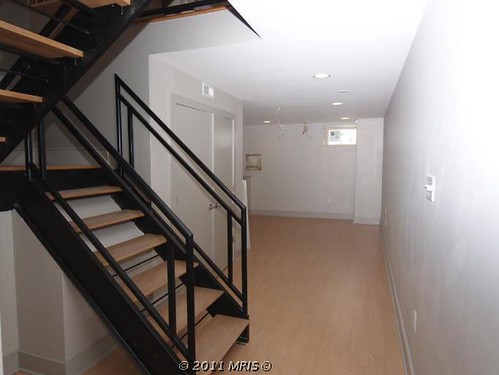
The third floor is what we fell in love with. It is a master suite with the bedroom at the front, the master bath in the back, and a wet bar leading out to the rooftop deck. Here is the landing, looking forward toward the bedroom.

atrium 2

Turning around 180 degrees and you have the wetbar to the rooftop deck.

wet bar 2

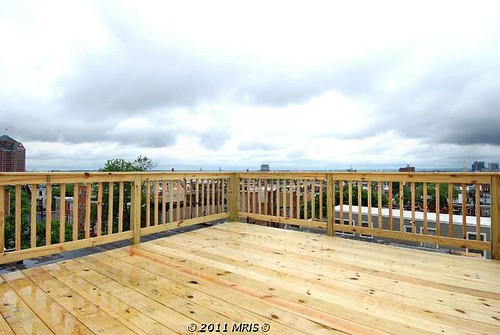
There is a small deck landing on this level, and then up you go one more level to the main deck area. It has view of the harbor and will be great to watch fireworks from. :-)

rooftop deck

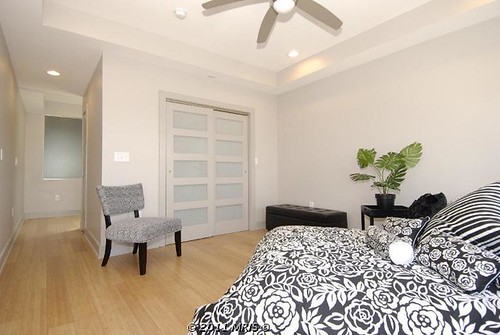
The front of the third floor is the master bedroom, with a nice big walk-in closet with a glass panel door. All the bedrooms have recessed lighting and ceiling fans, and the master has the nice coffered ceiling.

master bed

The master bath at the back of the third level has a double vanity, a soaking tub, and to the left of the vanity there is a stand up shower with a bunch of a jets and a floating glass door.
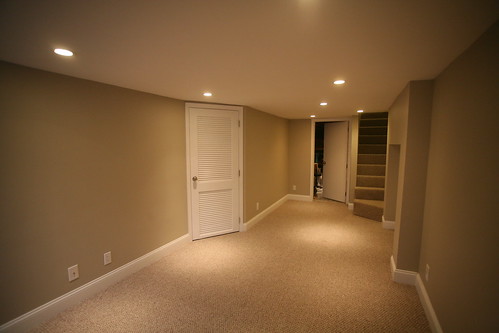
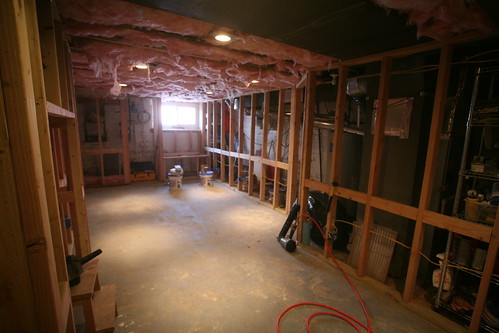
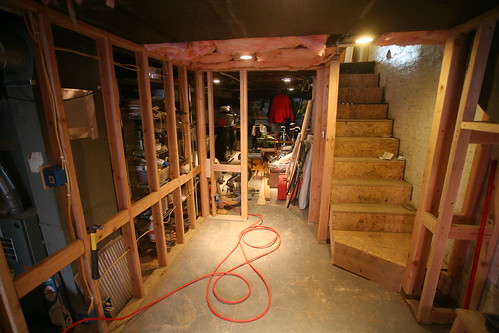
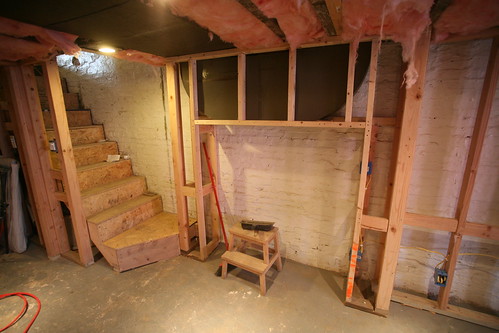
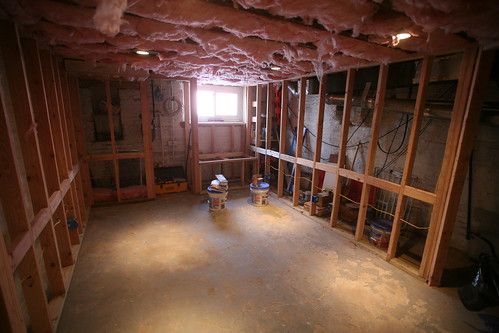
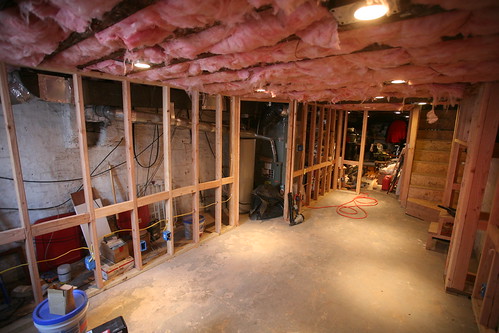
master bathroom

Also, the 
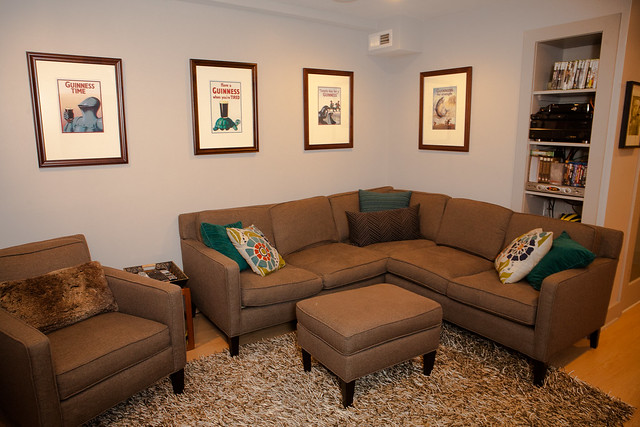
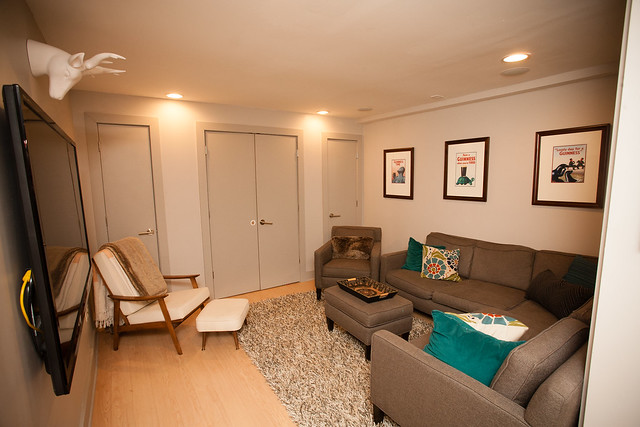
mancavebasement is fully finished and runs the length of the house. It also has a full bathroom, just in case I need to shower in my mancave. You never know...

basement stairs

We have a parking space in the back, but our one major thing we gave up with this house was a yard. :-( For more pictures of the house, including the full floor plans check out the virtual tour.

parking pad

Thus far, all things are heading smoothly, so hopefully all continutes to go well and we'll be moving in a little over a month.

Tuesday, July 19, 2011

Updated Mechanicals

After looking at the blog, I noticed a draft I never completed. So I finished it. :-)

Looking back to '08, I was considering a new HVAC system. Our system was old, energy usage was up, and the system wasn't keeping up with the heat and cold. I should have redone the system then. But I didn't. And it continued to get worse.

Last October the furnace went down, and since we were in a better financial position than we were in '08 we decided to update the system. Since we had issues with both the furnace and the A/C it was time to update both. I got quotes, and ended up going with a SEER 16 2.5 ton unit outside, and a 80% efficient gas furnace inside. All said and done the costs came in at $5100. We then got $600 in rebates from Rheem, $500 from the State of Maryland and an additional $350 from BGE. With the combination of the SEER 16 outdoor unit and 80% efficient indoor unit, we were also eligible for $1500 in tax credits. What originally was a ludicrous cost became a manageable cost, especially since replacing the equipment late in the year minimized the time between our payment and subsequent tax return. Also, by negotiating our deal in late fall the HVAC companies were looking for work which allowed us room to negotiate.

While the up front costs were high, overall it was a good decision that I wish we would have done sooner. I don't know if we will ever get the money back for this, but doing this change two years later than we should have cost us a lot in extra energy bills. If I had to do it all over again I would have done it sooner.

Also, as we were looking at the HVAC upgrades we realized our ducts were undersized. Especially our return ducts upstairs. We decided not to undertake this task yet, as we wanted to see how much just changing out the units helped. While it has definitely lowered our costs, at times I can tell we need more air changeover upstairs. In the long run I think this task is something that should be done, but for the next few years it is definitely on the back burner.