Thursday, August 4, 2011

Basement Complete

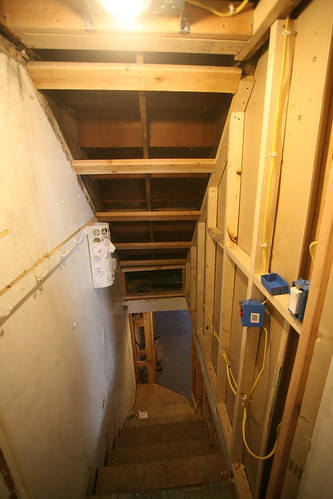
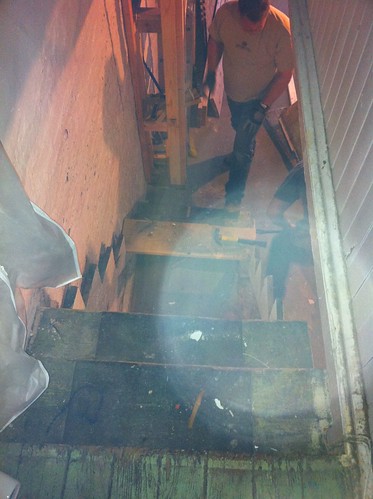
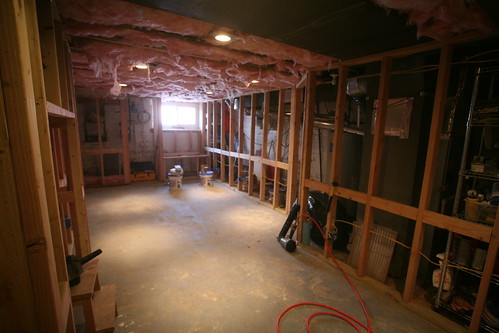
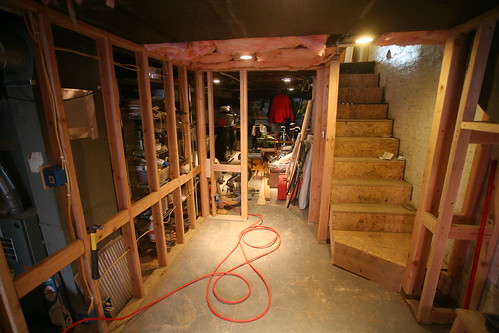
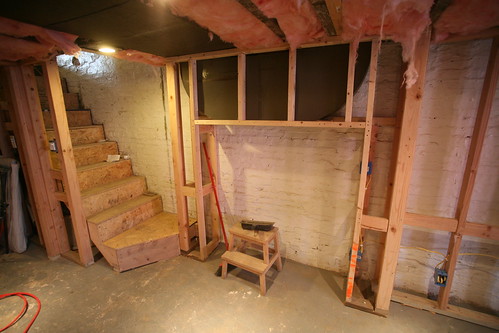
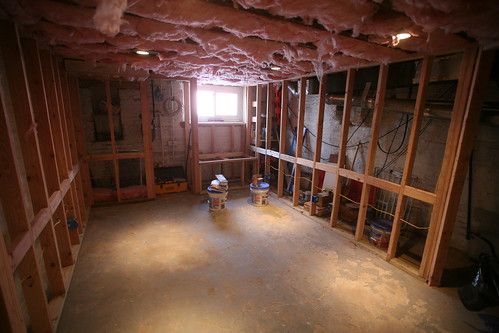
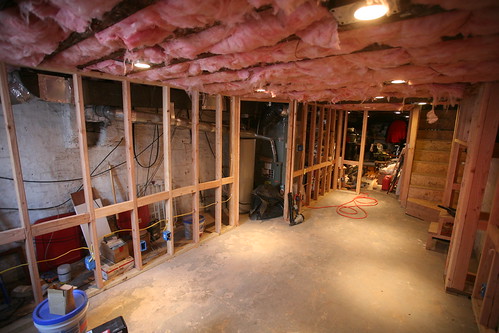
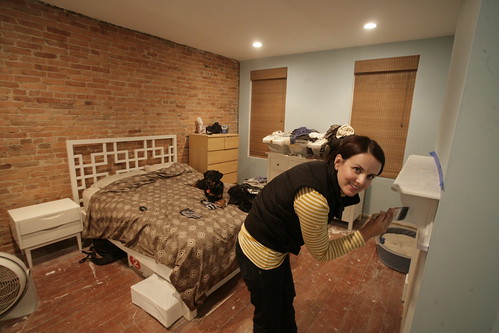
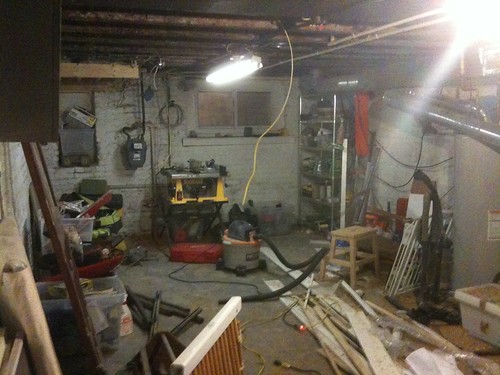
At last glance, the basement was framed and electrical rough in complete. Not pretty, but well along. At this point, I can proudly say the space is complete. We brought in a contractor to hang and finish the drywall as well as hang and trim the doors. At the time, I was unsure of using contractors, but in the end I'm glad we did this. The price was reasonable and in the tight timeline of getting the place rented out we needed this done quickly.

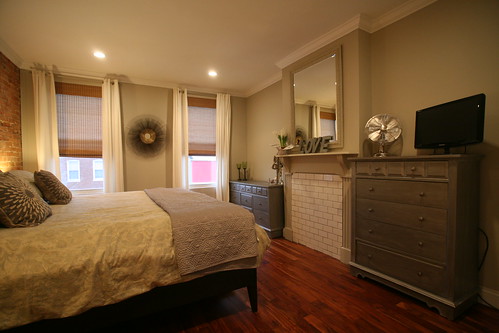
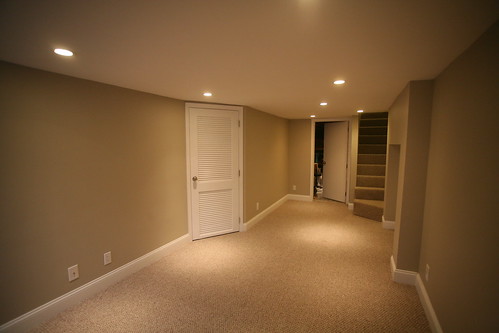
The contractors finished up on Thursday. Friday through Sunday we had a lot of help from the Bro in Law (BIL) and Sister in Law (SIL). By the time the dust settled and the carpet was installed, we went from a space with drywall and doors hung to this.


IMG_2767

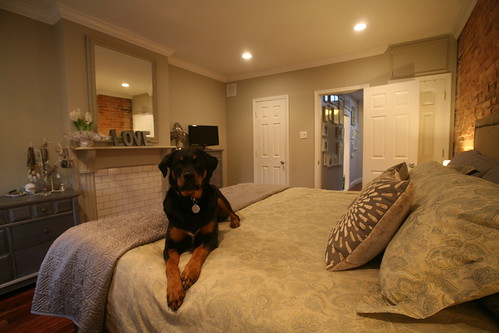
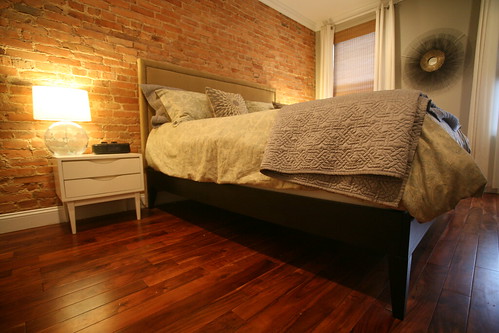
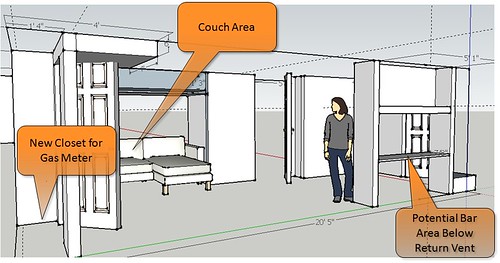
We are still amazed of the transformations. The ceiling height is only around 6'6" but thankfully it doesn't feel too short. I wish it were taller but it wasn't worth the extra money of digging it out. We painted it the same color as the master bedroom, and are glad we did so. We painted the area underneath the return duct semi-gloss white for contrast and to the right you can see how the window and bench turned out.

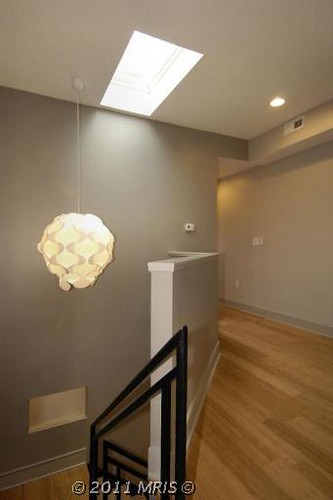
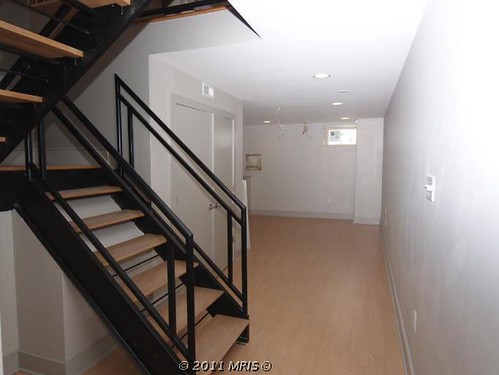
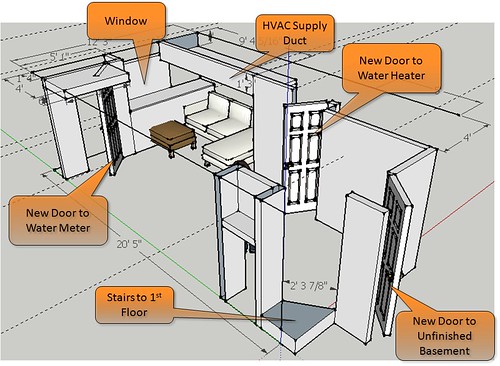
Looking back from the front of the house toward the stairs is the door to the utility closet to the left, the door to the unfinished area in the middle, and to the right the stairs up to the first floor.

IMG_2765

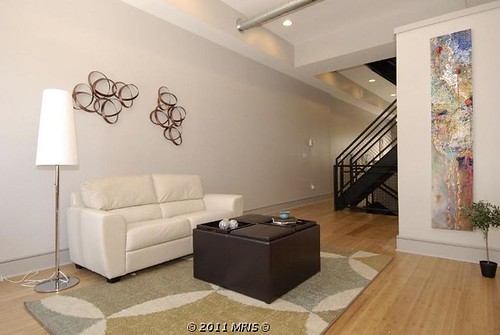
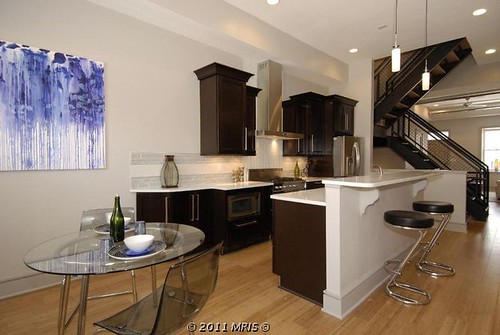
Thus far our only regret is that we didn't do it sooner. With buying the new place we won't ever have a chance to truly enjoy this basement. Hopefully our renter enjoys it, and looking back, it is quite an improvement.

IMG_2767

Sunday, July 24, 2011

Basement Framing & Electrical Rough-In Complete

Now that we are under contract on the new place, the basement renovation kicks into high gear. Much like in December of 2008 when we decided to refinance our mortgage and creating a deadline to finish renovations, we are now in a similar position. We want our house occupied by a renter on 9/1. Yowza. With a basement under construction, a new house upcoming, a trip to Irelend, and finding out what the hell we need to do to rent the place the next month will be crazy. Time to kick things in gear...

In keeping with this, we are bringing in some help on the drywall. We got a bunch of quotes that were surprisingly reasonable. We ended up picking a mid-cost quote of a guy that I trusted. We then got him to throw in a bunch of extra work like hanging all the door jambs and doors and fixing a three switch that had gotten the best of me. An aside, when picking contractors, I usually go with my gut. This is never the high cost bidder, but usually someone at the mid to low end that will end up working with me a bit. This sometimes means quality is 90% instead of 100% but the lower costs have been things that I've been able to help fix.

Here is where we stand. Coming down the stairs, all the paneling, plaster and lathe, and most importantly the stairs were ripped out and recessed lights on a 3 way switch were put in. It looks great now.


Basement Reno - Framing & Electrical Rough-In

During the renovation it didn't look as good. I was hoping to keep the stairs as is, but after looking at them in detail they needed to be replaced. They literally bounced when you walked on them and were held up by about 6 nails total. Scary. Luckily, my amazing father agreed flew in from Detroit to help frame the basement and (little did he know at the time) replace the stairs. This basement would not be done if not for him. As you can see, the stairs were scary.

basement stairs

Walking to the bottom of the stairs and looking out things look much different than before. Before, it was a pile of crap.

dirty basement with captions

The view looks much better now. All the recessed lights are in, the plumbing lines and electrical to the second floor have all been rerouted to increase the headroom, and insulation is in place to help isolate the sound from the first floor living room.

Basement Reno - Framing & Electrical Rough-In

A look back at the stairs and portion of the remaining basement that will remain shows the recessed lights back in that area. I put the lights on a motion sensing/IR switch so when you walk in the space with your arms full of laundry you don't need to find a switch. We were talking about making a bar or closet in the area to the left but now that we are going to rent the space, this isn't a priority.

Basement Reno - Framing & Electrical Rough-In

To the right of the stairs is the framing around the HVAC. I added a small step at the bottom of the stairs to steer you toward the center of the room and away from the framing around the HVAC return. I was going to put a custom wine rack in this area, but again, this isn't a priority at this point. I added electricals circuit here in case I want to get fancy in the future with lighting the wine or potenially add a small bar over here.

Basement Reno - Framing & Electrical Rough-In

Walking a few steps forward, you can see more of what the living space will look like. A small closet is on the left, and I made a bench underneath the window to fill this dead space. On the right, there is a storage area that is accessed through the utility room door. Originally I was going to just do a soffit in this area, but the HVAC and water heater exhaust would still have been too low to make this area usable so I just closed this space in. The soffit change resulted swapping the seating area to the left instead of the right, but it shouldn't be that big of an issue.

Basement Reno - Framing & Electrical Rough-In

Looking back toward the stairs you can see this utility room. This room required moving the water heater to allow one door to be able to service the equipment while allowing space into the closet space to the left.

Basement Reno - Framing & Electrical Rough-In

While overall I don't like using contractors, it is nice to know that by the end of this week the drywall will be in and mudded and all doors hung. As I type, guys are loading drywall into the house. Hopefuly it will be hung with a first coat of mud in place by the end of today. :-)

Friday, July 22, 2011

The New Casa: A Sneak Peak

We considered buying a "shell" and having a contractor do the work to finish it. After we found this house for a good deal, we knew this was the house for us. Take a peak.

Here is the outside of the house, which is just fine. No great curb appeal. Since this picture was taken they painted the trim black and the door a nice gray.


front

Through the front door is the living room, with a small 1/2 bath on the right. The ceilings are 12-14' tall on this floor, so while this house is the same width as our (about 12' interior), the ceiling height helps make it feel larger.

living room

At the back of the house is the kitchen and dining room. The stairs of the house are in the middle, bisecting the space. Since they are an open stair it helps to make things still feel open. The kitchen has nice cabinets, counters, appliances, and a pretty good overall design.

kitchen 2

Here is the second floor layout, showing the two bedrooms each with their own bathrooms. Also, having the washer and dryer on this floor is pretty nice.

second floor plan

I can't pull the pics of the bedrooms into this post, but both they and the baths are pretty nice. Here is a sample of the bathrooms. Overall the tile quality is good in all of the 4.5 bathrooms. I don't know what we are going to do with all of those bathrooms, but the more the merrier?

back bed bath

The third floor is what we fell in love with. It is a master suite with the bedroom at the front, the master bath in the back, and a wet bar leading out to the rooftop deck. Here is the landing, looking forward toward the bedroom.

atrium 2

Turning around 180 degrees and you have the wetbar to the rooftop deck.

wet bar 2

There is a small deck landing on this level, and then up you go one more level to the main deck area. It has view of the harbor and will be great to watch fireworks from. :-)

rooftop deck

The front of the third floor is the master bedroom, with a nice big walk-in closet with a glass panel door. All the bedrooms have recessed lighting and ceiling fans, and the master has the nice coffered ceiling.

master bed

The master bath at the back of the third level has a double vanity, a soaking tub, and to the left of the vanity there is a stand up shower with a bunch of a jets and a floating glass door.

master bathroom

Also, the mancavebasement is fully finished and runs the length of the house. It also has a full bathroom, just in case I need to shower in my mancave. You never know...

basement stairs

We have a parking space in the back, but our one major thing we gave up with this house was a yard. :-( For more pictures of the house, including the full floor plans check out the virtual tour.

parking pad

Thus far, all things are heading smoothly, so hopefully all continutes to go well and we'll be moving in a little over a month.

Tuesday, July 19, 2011

Updated Mechanicals

After looking at the blog, I noticed a draft I never completed. So I finished it. :-)

Looking back to '08, I was considering a new HVAC system. Our system was old, energy usage was up, and the system wasn't keeping up with the heat and cold. I should have redone the system then. But I didn't. And it continued to get worse.

Last October the furnace went down, and since we were in a better financial position than we were in '08 we decided to update the system. Since we had issues with both the furnace and the A/C it was time to update both. I got quotes, and ended up going with a SEER 16 2.5 ton unit outside, and a 80% efficient gas furnace inside. All said and done the costs came in at $5100. We then got $600 in rebates from Rheem, $500 from the State of Maryland and an additional $350 from BGE. With the combination of the SEER 16 outdoor unit and 80% efficient indoor unit, we were also eligible for $1500 in tax credits. What originally was a ludicrous cost became a manageable cost, especially since replacing the equipment late in the year minimized the time between our payment and subsequent tax return. Also, by negotiating our deal in late fall the HVAC companies were looking for work which allowed us room to negotiate.

While the up front costs were high, overall it was a good decision that I wish we would have done sooner. I don't know if we will ever get the money back for this, but doing this change two years later than we should have cost us a lot in extra energy bills. If I had to do it all over again I would have done it sooner.

Also, as we were looking at the HVAC upgrades we realized our ducts were undersized. Especially our return ducts upstairs. We decided not to undertake this task yet, as we wanted to see how much just changing out the units helped. While it has definitely lowered our costs, at times I can tell we need more air changeover upstairs. In the long run I think this task is something that should be done, but for the next few years it is definitely on the back burner.

Monday, July 18, 2011

And the Saga Continues...

While some news of late hasn't been good, there have also been some positive developments too. The largest development as of late has been that we are now under contract for a new house. :-D

before reno


It is the three story house on the left. Isn't it beautiful? Yeah, not so much. But that is the before picture, and we are definitely purchasing this place in after condition. So, after renovating a house ourselves, why are we buying a renovated house, and more importantly why this house? Here are a few reasons:

    1. Some high end properties are going for cheap. Prices have dropped a lot in the past 5 years, and it is a great time to buy.
    2. Mortgage rates are really low. Low prices and low rates? Double awesome. After paying for the current house's renovations with cash on hand, we know major renovations require major cash on hand. Our cash, blood, sweat and tears are in the house already. We may be able to generate more sweat and tears but cash is hard to come by.
    3. Our 2 bed/1.5 bath won't magically sprout more bedrooms and bathrooms and overall square footage. While renovating the basement helps the value, it only helps to close the gap of making us competitive instead of just being overpriced for the size.
    4. After going back and forth for the last couple of years of city vs. burbs, we've found that despite higher taxes and increased crime we like cities. Also, most burbs houses we like require us selling our house and taking a hefty loss. I don't like taking losses.
    5. It has parking. The parking pad is essentially removing your backyard and replacing it with a parking space. Being in a city with mostly street parking and higher than average crime rates, having a guaranteed spot is important. We would have liked a yard AND a parking space, but most properties with both were coming in at $150-$200k more. Ouch.
    6. This house price allows us to get approved for this mortgage without selling our current house. While home prices and rates are low, rent in the city is increasing. A great time to buy means sellers are screwed. By not selling our property and getting decent rent we will have someone else pay off our house for us as the market improves.
    7. We are ready for something new. Hopefully this scratches our itch. :-D

Most importantly, I'm glad this blog will be able to continue, though probably more in a decorating/life updates stance versus a ohmygodicantbelieveimdestroyingthewholehouseblog. Hopefully this is ok.

At this point, we are hoping all contingencies are met and there aren't any issues that prevent the sale. We will keep our fingers crossed and hope for the best, and will keep you posted along the way.

P.S. I swear I'll post some pictures of the basement soon. It is framed, electrical run, and sound insulation in place. You'll have to trust me on this since there are no pictures.

Sunday, July 17, 2011

Dear Grandma

I'm sorry I didn't get a chance to say a proper goodbye. I was glad to hear that mom and dad were by your side when your time came and that it was peaceful. I'm also happy that after 31 years, you'll once again be reunited with Jerry. I wish I could have met him.


Grandma

I want to remember all the good stories and times past. Like in Hawaii how we drove around with Aunt Harriett on the hunt for the perfect Mai Tai. And how happy Leigh and I were that you made it to our wedding. Or how when I threw fishfood at your feet and you called me a little shit (you were right, I was). And when after the in-laws came to visit Michigan you begrudgingly told them they were alright. The thought of no new memories with you in them is a tough pill to swallow.

Grandma's Hands

While I wish I was there to say goodbye, most of all I'm just flat out going to miss you. I'm going to miss the sound of your giggle, the sight of you pushing your walker/chariot around with a martini on it, and your voice on a phone call. You always ended the call reminding me how proud you were of me. I was on cloud nine for the rest of the day, and Leigh and I would talk about how postively sweet you were. My heart keeps hoping you'll call but in my head I know that memories will have to suffice.

G-ma

G-ma - I'm glad that your pain is over, but I'm really going to miss you. And most of all I am proud to have known you.

Love,

Corey

Sunday, April 3, 2011

King Sized Bed Leads to Massive Upheaval

When you last saw the bedroom, it looked like this.

_MG_1240

While we definitely finished it off after that, and promptly forgot to take pictures, we then moved on to the next project. For years we lusted after king sized beds, but didn't think one would fit. We found a way around this and took the plunge. This started a massive upheaval in the bedroom design... Now that the house is pretty well done our style has shifted away from purely modern, and more toward something cozier. For the bedroom, the Queen was inspired by Restoration Hardware. We quickly tired of the bright blue wall and wanted something calming, so she picked the color palette from there, and we DIY'd a few pieces from there. Here is the inspiration.

Fall10_126_Warner_bedrm

And here is our final product.

IMG_2674

IMG_2684

Even Wally approves, and in this photo there is also a sneak peak of a future blog post... We even took time to finally put up crown molding.

IMG_2680

We copied the headboard from the Wallace Headboard and redid a couple of dressers we snagged from craigslist to mimic the Zinc Dresser. I thought about making a bedframe myself, but decided it would be too much work so we bought the narrow leg bed frame from west elm.

IMG_2690

While the bedding is actually from Restoration HW, it was on sale so we didn't feel too bad about it. :-) The Queen also picked up a new mirror from Home Goods, which matched the paint color and style perfectly. We also took the plunge and decided to paint our mantle the same color as the wall, and we are extremely pleased with the decision.

IMG_2691

For the next post we'll talk a little bit more about the headboard and our restoration of the dressers. Both projects took quite a bit of time, but at a price savings of $4,200 off Restoration Hardware we are quite pleased. We are also waiting for a huge 50" x 35" vintage map of Istanbul that will be placed over the bed. Once the map is in place this room is considered complete.

Monday, March 28, 2011

Pit of Despair Design

Now that you've seen the pit in all of its unfinished glory, here are some explanations of the space.

dirty basement with captions

Pay special attention to my return duct in the way of the stairs and the pile of crap on the floor. Also notice the plumbing and electrical conduit lines underneath the joints through the middle of the space. It will be lovely rerouting this. I greatly look forward to this endeavor... Also, as we go forward please be patient with my adjustment of the space to make sure it corrects for my screwing up the initial measurements accurately represents what is really there. For instance, in the following picture I screwed up the return vent width at the foot of the stairs showing it as 24" long when it is really 61" long. Oops.

basement1

Here you can see the overall space and the new doors to the gas meter (it says "water meter", but I screwed up), the door to the water heater (I actually got this right). To the right side of this door is the furnace. On the right side is the new door back to the unfinished portion of the basement. Planning around the many obstacles is creating dead areas, and the fun part is figuring out ways to minimize these areas to maximize usable floor space. For instance, to use the space to the left of the stairs underneath the return vent that juts 24" below the joist I've thought about adding a bar counter high enough to add some glasses and a mini fridge.

basement4

I'm not sure what else I can do with this low space, other than adding a wine rack or something of the like. Also take a peek to the left to see where I put the couch, which is a way to use the 5'-6" height underneath the supply vent without eating into the space. I put it on this side of the house as I want a chaise or an L shaped couch and the new closet for the water gas meter means I can't put an L/chaise here. If I put the couch in space shown, it uses the dead space forward of the gas meter as a place to put the TV on the opposite wall. This is shown in the next picture where I was too lazy to create actual built in shelves in sketchup and instead just show an orange call out where I'd put the shelves. Hopefully you all have excellent imaginations.

basement5

The custom built-ins would create extra work for me and while I probably wouldn't get them 100% right it would allow me some good practice. The bad news about this is it would pretty much take up this whole wall. With the door to the gas meter where it is I'm not sure what else I could really put in this area though. In this view I also added a notional space for a closet in the dead space between the stairs and the unfinished portion of the basement. This could serve as a good space to hang winter/summer clothes during the off season, and since the space is so narrow I'm not sure what else I could use it for... One layout I'm considering for resale purporses is to create a space separate from the stairs that I can market as a bedroom in the future.

basement6

Making a wall here creates a deadspace at the bottom of the landing. While I can fill part of this space with a closet, it really chops up the space. That said, a chopped up space that creates an extra bedroom in a two bedroom house is something that deserves consideration.

Well, now that you've seen the space what are your thoughts? It would be nice to hear some opinions on how you would configure the space. I'm not sold on any specific design and am curious to hear peoples' opionions. Please help! :-)

Sunday, March 27, 2011

Basement Beginnings

Instead of spending the last couple of years renovating, I've been off getting married, getting fat, and doing many things other than renovating. But now it's time to get back to work. In the past few months the Queen and I have been busy finishing up the crown molding upstairs, redoing the bedroom in a Restoration Hardware style, and have started to finish the basement. The first two items will be covered in later posts, but for this post I'll focus on the basement. Or from now on, I'll call it the pit of despair, or just the pit. The pit has been so horrendously scary for the past couple of years we've been afraid to do anything with it. Check it out...

dirty basement

Scary, eh? And this is after I spent a long time cleaning it and selling a ton of crap on craigslist. After making it so I can actually see the floor I have motivation to now cover it with plushy carpet and make it my mancave a non-gender specific den. I have so much motivation that I told my father about it and ask him to come in from Michigan in a few weeks to help renovate it. Oh yeah, it's on like Donkey Kong...

In normal spaces renovation is pretty straight forward as there are usually flat floors and ceiling free of obstructions, and you are usually nailing into all wooden surfaces. Not in a basement. My basement has a crusty old uneven floor, the height is about 6 and a 1/2 feet to the joist, and the edges of the rooms are an obstacle course of ducts, plumbing and other goodies. To get ready for this I've started drilling holes through the joist to re-route the electrical and plumbing, and to draw the place up using Google sketch-up. It is going to be a framing nightmare, but once I figure out the floor plan I'm hoping I can do up the place pretty nice.

Since I bought the house in 2006 and did a quality renovation, there is zero chance I will get back all the money I put into it. I've come to accept this. That said, the basement renovation plan is to make a space that is usable as a second entertaining space for a very low budget. I'm hoping to to it for under $4,000. This means there will be sacrifices.

    1. We aren't digging out the basement. With a ceiling height of about 6 and a 1/2 feet, there isn't much height. To dig out the basement would cost on the order of $30'ish bucks a square foot. There is no way I'll make this money back. To make the space not feel claustraphobic I'll be using recessed lights and trying to keep as much headroom as possible.
    2. While we only half 1 and 1/2 baths, we aren't putting in a new bathroom in the basement. This would require smashing through the floor, and then without raising the ceiling height we probably couldn't put in a shower. While it would be great to have another bathroom I just don't think it's worth the expense.
    3. The floor is old uneven cement, and it's going to stay that way. My plan is to carpet over the old concrete. To rip out the concrete, or to attempt leveling it would be some big bucks.
    4. I will only finish the front 20 to 25 feet of the basement. The total basement depth is 45 feet. The back area house a nice storage area and the laundry area. While it would be nice to have a finished laundry area, it just isn't worth the money. Also, I really like having some unfinished space in the basement for storage.
    5. I will try to work with my existing HVAC, water heater, and water meter locations. To move my main mechanicals will cost me thousands, and while the constrain the space more than I'd like, I think if I optimized thing I'd only gain a few extra square feet of useful area. My plan is to be creative using lots of storage in hidden/unusable corners and crannies.

Next post I'll talk a bit more about the design and some of the design trades I'm thinking about such as whether to make this a future bedroom with it's own door, adding a closet vs. a mini bar area, and building a custom entertainment center with built-in book shelves.