When you last saw the bedroom, it looked like this. 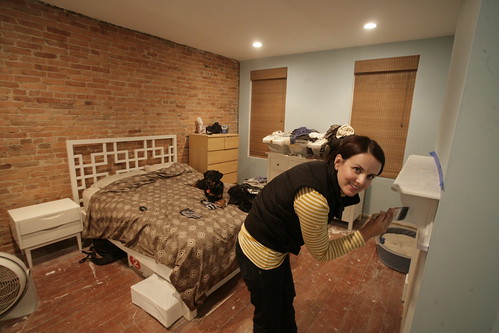
While we definitely finished it off after that, and promptly forgot to take pictures, we then moved on to the next project. For years we lusted after king sized beds, but didn't think one would fit. We found a way around this and took the plunge. This started a massive upheaval in the bedroom design... Now that the house is pretty well done our style has shifted away from purely modern, and more toward something cozier. For the bedroom, the Queen was inspired by Restoration Hardware. We quickly tired of the bright blue wall and wanted something calming, so she picked the color palette from there, and we DIY'd a few pieces from there. Here is the inspiration.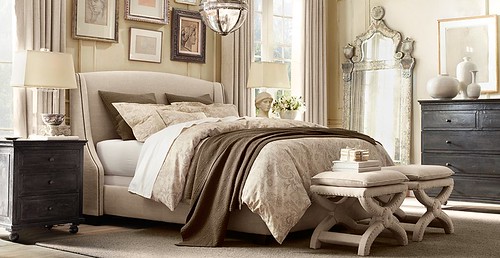
And here is our final product. 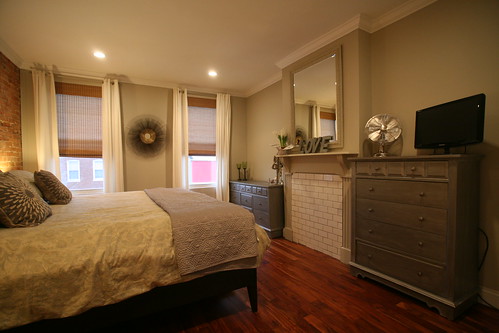

Even Wally approves, and in this photo there is also a sneak peak of a future blog post... We even took time to finally put up crown molding. 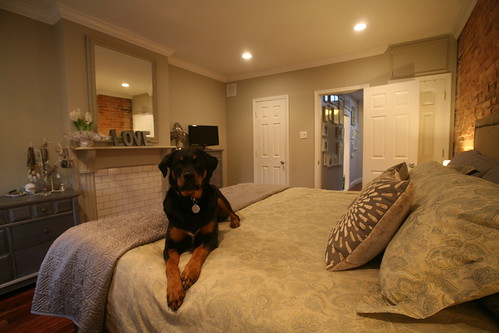
We copied the headboard from the Wallace Headboard and redid a couple of dressers we snagged from craigslist to mimic the Zinc Dresser. I thought about making a bedframe myself, but decided it would be too much work so we bought the narrow leg bed frame from west elm. 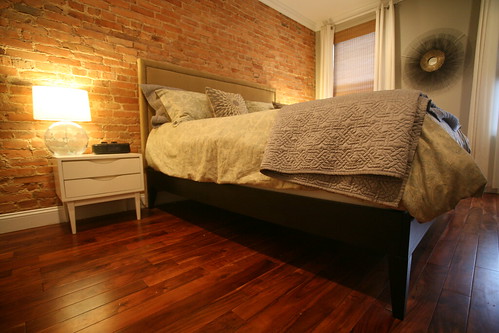
While the bedding is actually from Restoration HW, it was on sale so we didn't feel too bad about it. :-) The Queen also picked up a new mirror from Home Goods, which matched the paint color and style perfectly. We also took the plunge and decided to paint our mantle the same color as the wall, and we are extremely pleased with the decision. 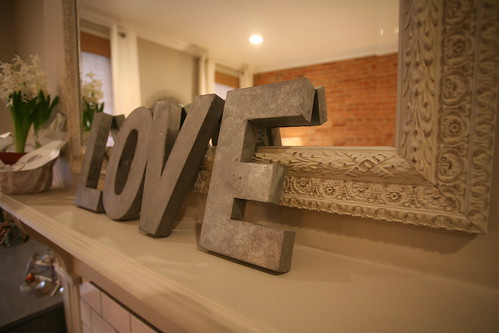
For the next post we'll talk a little bit more about the headboard and our restoration of the dressers. Both projects took quite a bit of time, but at a price savings of $4,200 off Restoration Hardware we are quite pleased. We are also waiting for a huge 50" x 35" vintage map of Istanbul that will be placed over the bed. Once the map is in place this room is considered complete.
Showing posts with label master bedroom. Show all posts
Showing posts with label master bedroom. Show all posts
Sunday, April 3, 2011
King Sized Bed Leads to Massive Upheaval
Wednesday, November 5, 2008
Dog Shower?
Wally is ready for the tub to be done too.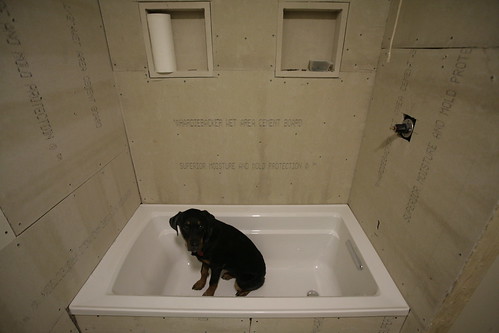
And the Queen is entirely too excited in this picture.
Tuesday, October 21, 2008
And It All Came Crashing Down
Remember that pretty mirror hanging over the newly painted fireplace?
Getting woken up at 1 am to a crashing sound is a bit startling. Next time I'll use a heavy duty fastener. :-)
Monday, October 20, 2008
Most productive weekend evar!
How did we go from this?

To this, in a weekend?


A lot of hard work by the Queen and her bro is what got it done.
The Queen and I had a three day weekend so we worked hard to get the drywall issues fixed. The drywall is laid over plaster. It was not attached to the plaster or the joists well and the mudding job was extremely poor. This took a lot of fixing to make things look ok. Sunday the Queen's bro came over to help us paint the place. It was a long day that ended at 10 pm, with the closets fully installed and the painting done.
Next up in the bedroom is some drywall fixing, laying subfloor and the teak. Things like doors and trim are luxuries we may not have time for in the near future, seeing as the contractor starts work on the bathroom this week. For part of the bathroom work I'll be working with the contractor, so we haven't completely let go of our DIY roots, but with a single full bathroom we need to work quickly to get a shower back online quickly.
Wednesday, October 8, 2008
Wally the Handyman
Wally has been hard at work renovating the house.
He's grown a wee bit since we got him in August. He was a cute and cuddly 32 pounds and is now topping 50. We figure he's got at least another 50 to go. He's a goofy dog that is super smart, loves all dogs, people, kids and most of all loves us.
He's done a great job at taking a hodgepodge of doors and irregular surfaces on the bedroom wall, covering in the door to the closet from the hallway, and adding a doorway from the bedroom to the closet. He may not have an opposable thumb, but he's pretty good at drywalling.

Since this was taken he mounted a closet system and clothes are hanging in the space. The Queen is pleased, but now wants her closet complete ASAP.
Monday, September 29, 2008
Continuing the Closet Saga
Work continued this weekend on the closets. All of the drywall is up and the first coat of mud is complete on the new closet. While the new closet is very small at only 33" wide by 61" long, it is filled with seams so the Queen kept quite busy. It will make an awkward closet by the time we are done, but small spaces call for creative solutions. For now the plan is to install the Antonius closet system on the 33" wall (back of the closet) with clothes bars, 
and float one or two Billy Bookshelf units on the 61" wall. It will be very tight, but we'll work with the space we have. In the end this will be my closet, and the Queen will get the second much larger closet.
This weekend I focused my attention on completing the wiring in the closets and running electrical for the bathroom. The plumbing rough in is done, and once electrical rough on the wall is done on we can mount the vanity.
Also, we are starting to get bids on having someone finishing the bathroom upstairs. I'm not pleased about having someone else do the job, but work has been crazy lately, leaving us with little time for renovations. We've been plugging away at things but at this pace the house will be done in 2015. Hopefully the bids come in low, as we have done a fair amount of the work already and are willing to help out more as work continues. I'd really like to find someone who is willing to work with us on this in order to contain costs. With the housing market the way it is it just isn't wise to go overboard with home spending.
Wednesday, September 17, 2008
Building a Carrie Bradshaw worthy Closet
Since the Queen has moved in she has been constantly sick with wheredoiputmystuffinthisgodforsakentornaparthouse-itis. The whole upstairs is in disarray, so finding room for her stuff has been a wee bit of an issue. In trying to cure her ailment we've destroyed more stuff, namely one of my closets, and are in the process of expanding it so we have two walk-in closets in the master bedroom. 
In this picture I am looking to the almighty for help. We need all the help we can get.
Saturday, July 26, 2008
Drywalling Machine
Since drywalling is a pain in the butt, I figured the Queen should do it. Doesn't she look happy?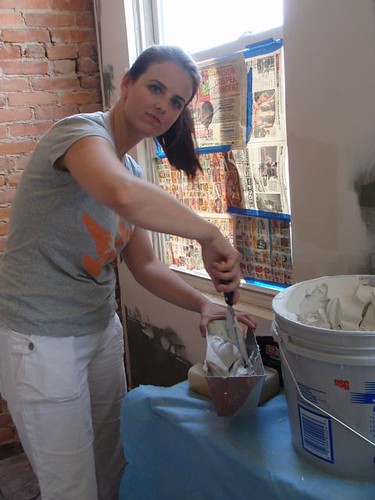
And for a random pic, here is my impression of an angler fish. 
Pretty good, no?
Sunday, January 20, 2008
More Brick Stripping Fun
The brick wall was wire brushed (used a brush from the grill), and then used muriatic acid diluted 10:1 with water. It worked great to get the plaster and mortar off the face of the brick. Watching the water and lime in the mortar fizz on contact was a bit disconcerting, but all part of the fun. It took a fair amount of elbow grease but the mortar all came off.
For now I am reasearching how to seal the brick. There is quite a debate regarding this topic online. Some people saying not to say it at all, while the other camp say to seal it but don't agree on a sealer to use. I've seen some brick in Baltimore that has a shiny look to it, which I don't like. I may just keep it unsealed for a while unless somebody can tell me a good matte sealer that can be purchased locally. That or until the dust from the wall bothers me too much and I pick up whatever Home Depot (HD) carries...
Lesson Learned: Be careful of what sprayer you put muriatic acid in. The sprayer bottle I purchased had metal in it for the pump spring, or some other metal in it associated with the pump. After about 20 minutes the sprayer wouldn't pump, as I assume the metal corroded out. A trip to HD later and I had a more expensive spray bottle for rougher chemicals - no metal at all in it. Of course being at HD allowed me to also purchase a much needed shop vac. :)
Exposing Brick
I decided to expose the brick in the wall adjacent to my stairway. This wall is continous along both the first and second floors. With my kitchen floors getting grouted yesterday morning, I thought it best to minimize dust downstairs. I had made a test cut in the drywall downstairs to see what was behind it. Turns out it was plaster applied to the brick, so I knew things were going to get a bit messy. The main bedroom was the first to get attacked, as the longest wall in the room had no (visible) electric runs along it. After reading a plethora of information on the web regarding exposing brick, I decided to just start tearing apart the wall and figuring it out as I go. For tools I used, a hammer and a couple of chisels. Safety glasses and a paper mask were used occassionally. :)
I made a hole in the drywall with a small saw, then started ripping the drywall away from the plaster. It was easy to remove as it was only attached to the plaster via furring strips along the edges. Not the most solid installation, but I'm not one to complain when it causes me less labor to rip out. A few hits with the small chisel made me wonder what I was getting it into. After the small chisel got things started, the larger chisel would come into play. I learned as I went along to start in an upper righthand corner, and move down and left. This works well if you are right handed as it allows an easier hammer swing. 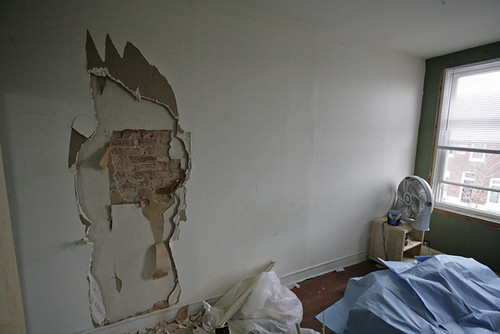
I also learned that less is more, when it comes to the amount of chiseling and prying to do. By using the larger chisel as close to parallel with the plaster between the wall, I hammered in the space as far as I could, trying not to pry. This was akin to peeling wallpaper slowly to keep them in longer strips. A lot of prying means a lot of chiseling. After a couple of hours Leigh showed up, and we started cleaning as we went. Chiseling is the easy part - clearing away all the debris is the hard part! 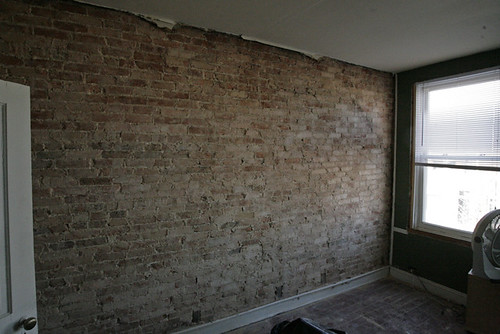
At the end of the day, the work was well worth it. The mortar is in decent condition, so I am going to try to avoid grinding our the mortar and repointing the brick. I like the natural look as is, and I really don't feel like making a bigger mess with an angle grinder. Today I get to brushing the plaster out of the brick, and using some muriatic acid on the brick to clean them.
Subscribe to:
Posts (Atom)
