The last week and a half have been a whirlwind. I had off from Christmas Eve until today, allowing plenty of time to work on the house. And there is plenty of work to report. In the past week all of Leigh's family to help at one point or another, my mother and father drove in from Detroit to help out for a full week, my coworker helped lay wood floors, and I had contractors at the house for some of the time helping out too. So much work was completed that I can't cover it in one post. This post will document the transformation of the guest bedroom.
To start, you have to understand how horrible the room was when I moved in. The previous owner painted a beautiful mural in the room. My parents came to visit soon after I purchased the house and stayed in this second room. You can tell by the look on my father's face how much he enjoyed the mural. 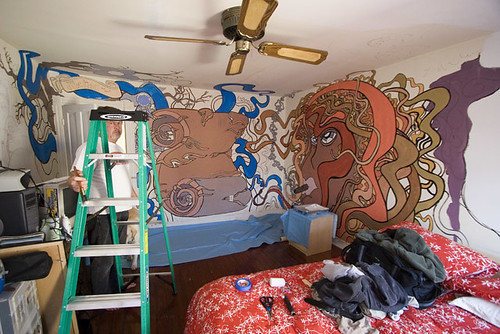
By the time they left, a single coat of primer applied to hide the evil Medusa mural. It didn't hide it much, but at least Medusa was a bit subdued.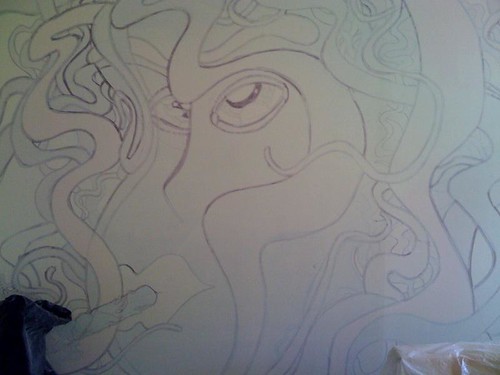
The room stayed this way until the Queen moved in. At that time, we needed a place to store her stuff while we renovated so the guest bedroom was turned into a storage shed. 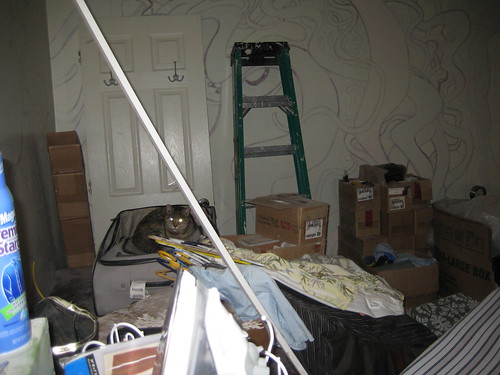
Notice the cat in the middle of the room. She enjoyed the space just fine as a storage space.
As renovation progressed we've been able to slowly clear out this room. A few months ago I noticed one of the windows was broken. I knew this was a bad sign, as the window is on a 5' unsupported overhang of the house, so I figured this area was settling. When we ripped out the back wall a few weeks ago we discovered we had a bigger problem than I had previously thought. Termites. 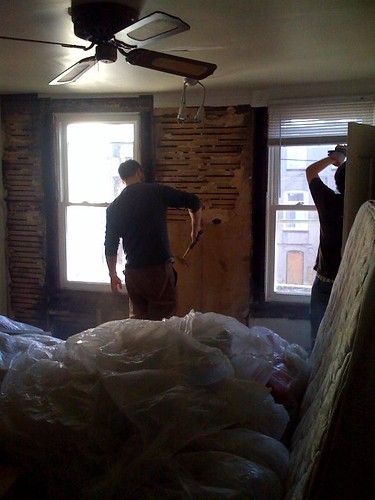
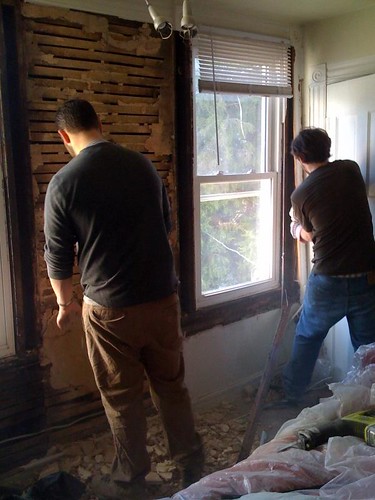
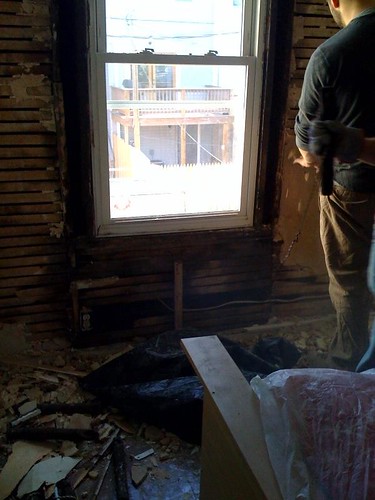
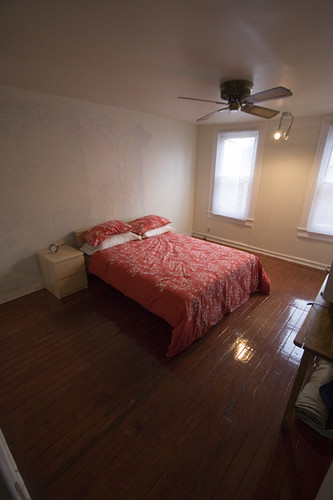
In a matter of a few weeks we've come a long way.
Here is a rundown of the work done in the room.
A lot more work was done in the past week, and there is a lot more detailed explanation of the work done, but I'll save that for later. There is still some more work to be done in the room, like completing the trim and finishing the closet, but we are very pleased with the progress.
Thank you so much for everybody's help - words can't express our gratitude.

19 comments:
Love all the pictures!! I never saw the mural before the first coat of Kilz...it's, uh...Wow. The room looks beautiful now, great job. It seems the octopus in the Aquarium picture does pay homage to the Medusa. Hehe.
It's stunning! But... I'm kinda missing the medusa... ;-)
Does this mean we can come visit!!!
Um wow! That was a mural if I have ever seen one. Great job on the reno!
Wow, there are no words to describe that mural! Great job on the renovation.
You've been busy!! You've totally transformed the room. The room looks great!
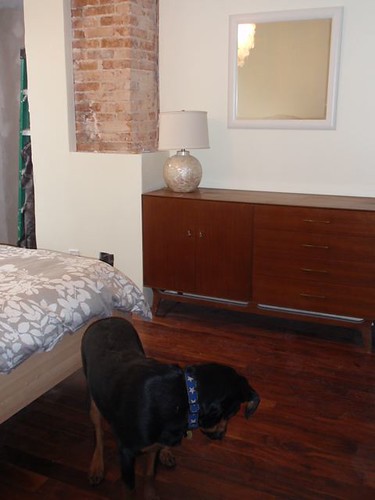
I love how Wally is admiring the teak floor since it looks awesome ... I also like how you kept part of the bumpout exposed, I need to get back to work on my place.
WOW! That's a lot of work -- but what progress. Congrats!
I'm SO impressed, guys.
Yes Dru, we'd love to have you and Kate visit in a month.
Thank you all for your kind words.... :-)
Fantastic work, Corey and Queen!
Nicely done!
Looks good. I know you were worried there for a bit. Looks like you showed them termites!
Mark
Eek, that was scary mural! That section of exposed brick totally rocks my world!
hey my dear friend. in India and specially in Bombay the concept of guest bed room does not take shape. but i will rather take this post has a renovation of my bed room. this post is good.
Post a Comment